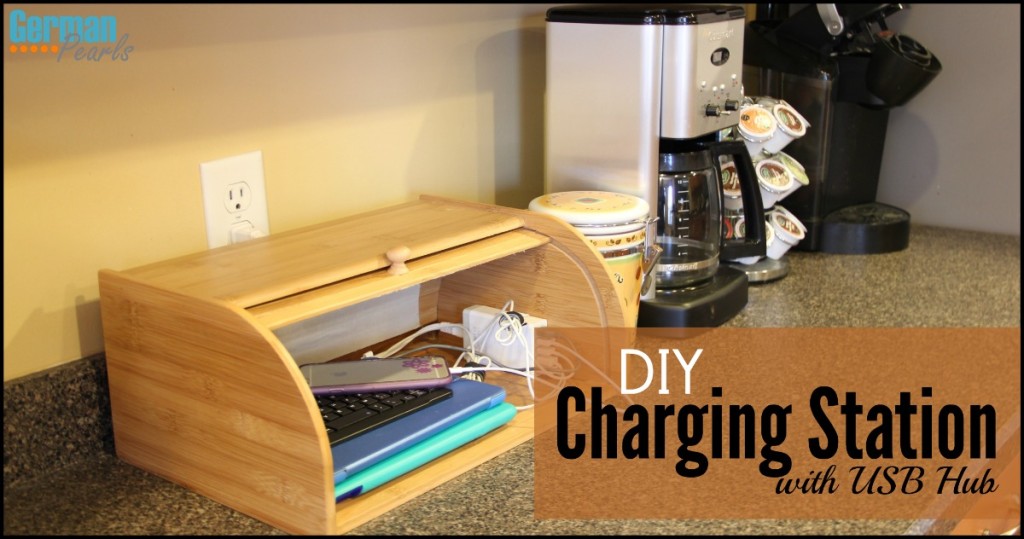
Make your own DIY charging station!
I love to be organized and attribute this to my strong German roots. In his article “10 Things You Should Know Before Moving to Germany” Adam Groffman states that in Germany “there’s a place for everything”. That’s definitely true in my world! And, when something doesn’t have a place – you make one!
The longer you stay in Germany, the better you get at organizing things. –Adam Groffman
So, when the number of devices in our house began to grow and we were charging them on the kitchen counter I knew I had to come up with some type of DIY charging station organizer. So, naturally, I took to pinterest to get ideas and found the blog Four Generations One Roof and Jessica’s DIY phone charging station.
Jessica’s homemade charging station had the benefit of hiding the clutter (love this!) but wouldn’t fit the growing number of gadgets we had in our house (and some of the larger cases on the kids’ devices). So, I set out to find a way to make a charging station for multiple devices. After some research I found that a USB hub might work. I did some more research (of course) and came across the USB PowerPort Multi-Port Charger by Anker. Voila (that’s not German) an idea was born!
NOTE: Check out our latest iPhone quick tip!
 Note: This post may contain affiliate links.
The Best USB Hub for Charging Multiple Devices
Before we dive into the homemade DIY charging station I made I want to give you a bit of background on the USB hub I found because I think it’s that cool (this is my geeky side coming out). This USB splitter works like a power strip. There’s only one power cord to plug into the wall. Then, you can plug in up to 5 USB charging cables into it and be charging up to 5 devices at the same time! Now USB charging is different than regular power cords. It’s not obvious to the naked eye but some devices charge at different currents than others. What does that mean? Here’s an example. An iPad is designed to charge at roughly 2 amps (2A) and an iPhone is designed to charge at roughly 1 amp (1A). That’s why the plug that you get with an iPhone is different than the plug that you get with an iPad. If you use the plug that you got with your iPhone to charge your iPad it will work, it will just charge slower.
So, what does all of that have to do with my favorite USB charging hub? Well, it’s a smart hub – yay! ALL of the 5 ports are capable of putting out 2A of power BUT they don’t unless it’s necessary. The unit detects when it’s connected to a device that “wants” 2 amps and it delivers 2 amps. It also recognizes the devices that “want” 1 amp and it delivers only 1 amp to those devices. So, you don’t have to worry about which port you plug which device into. You can just plug your phone, tablet, Bluetooth device, etc. into any port and know that it’s going to charge as efficiently as possible. (The only exception to this is the fact that the total output of the device is 8A so if you have tablets using 2A in 3 of the ports (for a total of 6 amps being used) the other two ports will only be able to put out 1A each (for a total of 8A for the hub).)
Anyway, I’ve had this USB hub for well over a year and have been really happy with it. It eliminates the need for having multiple things plugged into the wall or a big power strip on our kitchen counter. It works great in the charging station – check it out below.
DIY Charging Station
So, now that I had the main components of our charging station, I put it together in a few easy steps.
Materials:
- Breadbox
- Anker 5 port USB Smarthub
- Command Strips – my favorite thing for organizing!!
- Velcro Straps
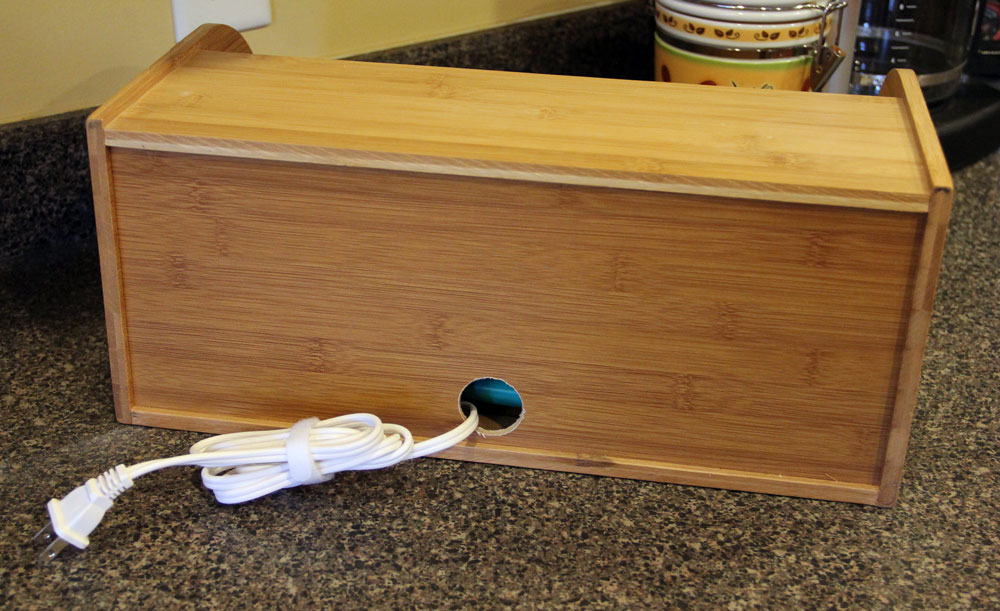
1. Drill Hole for Power Cord
First I drilled a hole in the back of the breadbox for the power cord. I used a drill bit large enough for the plug and made sure it was toward the bottom of the back of the box so it didn’t interfere with the rolltop when the box was open.
NOTE: You may also be interested in our post on how to fix a WiFi deadpost in your home.
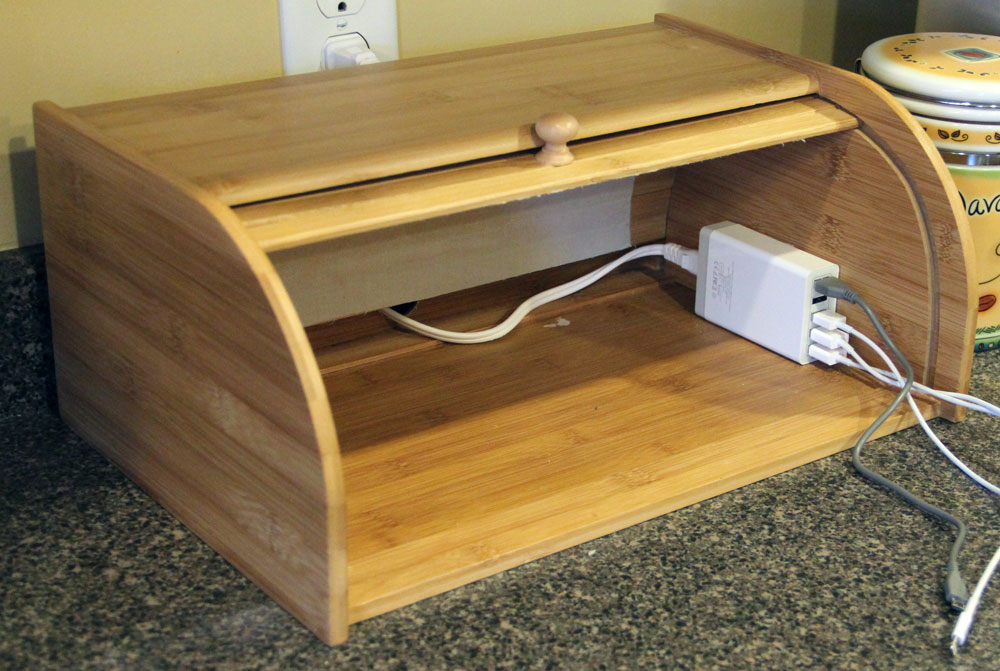
2. Locate and Secure the USB Hub to the Breadbox
When I first put the USB hub in the breadbox I didn’t like the way it floated around. It seemed messy and disorganized in my OCD world. 🙂 So, I used a few 3M Command Strips (love love love them!) to secure the USB hub to the side wall of the breadbox. This keeps it out of the way and in position.
See Also: 7 Tips for How to Charge your iPhone Faster
3. Add USB Charging Cables
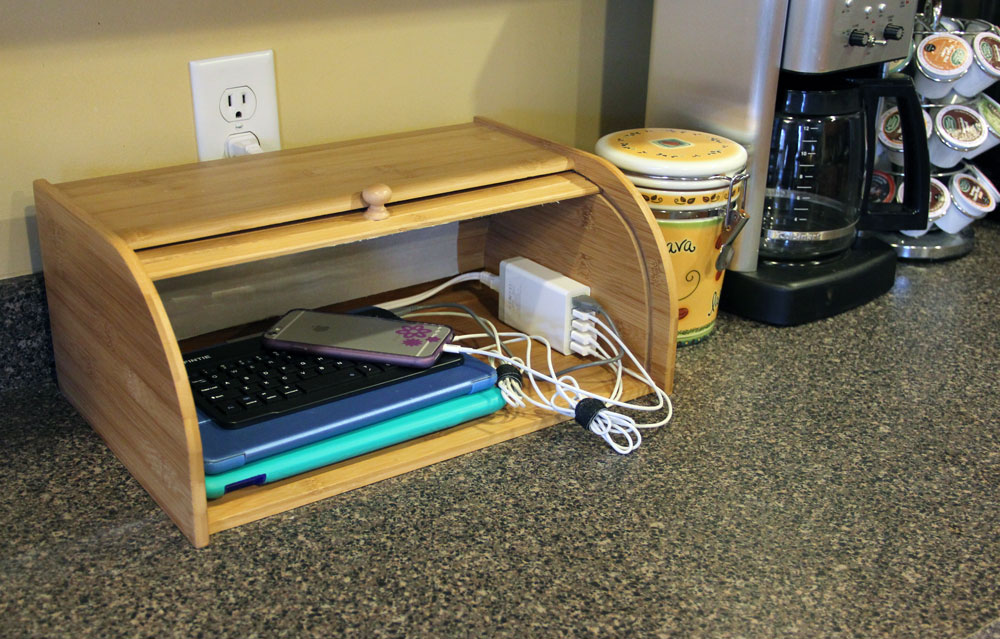
Next I just plugged in our USB charging cables and it was ready to be used! Now I didn’t like how long the cables were as they always seemed to be getting tangled and laying out on the counter so I made them shorter by wrapping them with the Velcro straps.
Note: I would love to just have shorter charging cables and have tried a few 1’ cables for the iPhone or iPad but haven’t found any that consistently work. The third party cables seem cheap and often cause problems with our Apple devices so we’re left with Velcro straps on our cables. If you’re using devices other than Apple these 1-foot micro-USB cables are an awesome option for you! It’s pretty inexpensive for a 3-pack and you can get them in pretty colors. 🙂
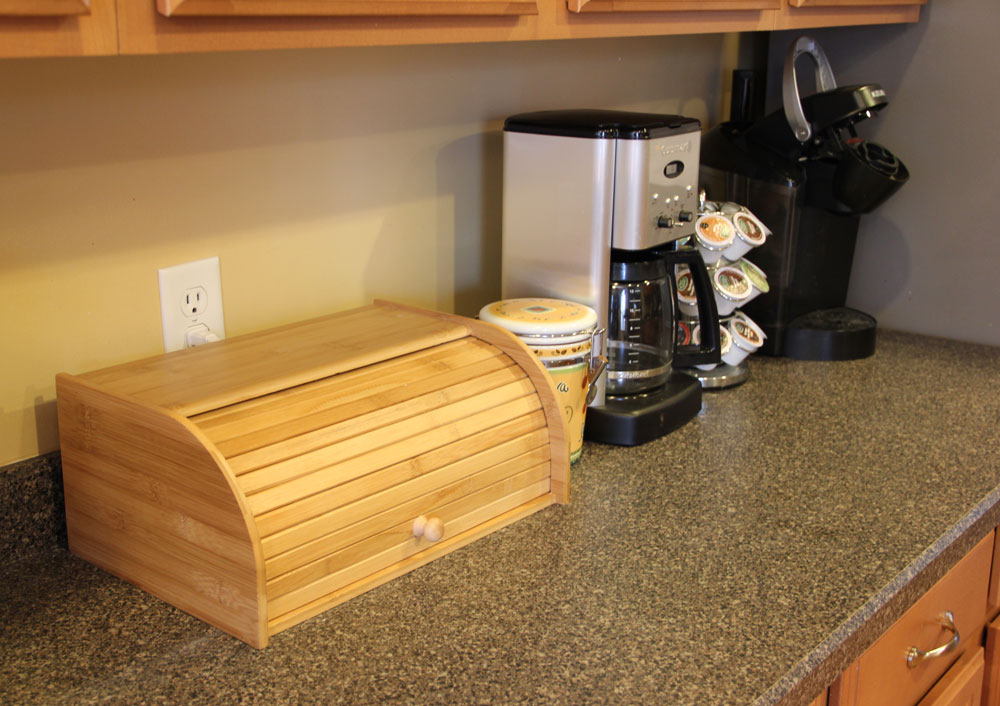
Here’s our charging station in action. The breadbox is even big enough to close with a few iPads (one in a big case) and other devices in it!
Note: You may also be interested in our post on how to install a wireless doorbell – no electrician needed!
Conclusion
Our homemade multiple device DIY charging station has been in use over a year now and it’s relieved my anxiety about the cluttered charging area on our kitchen counter! 🙂 Thanks again to Jessica at Four Generations One Roof for the idea and inspiration to do a DIY charging station. If you have any questions on how we made ours or the awesome USB charging hub (which I highly recommend even without making the breadbox station) leave a comment below and we’ll be sure to get back to you.
Thats genius and just what I needed!!
Jessica’s breadbox idea was genius! With the USB hub I can hide away many devices while they’re charging – I love how clutter free it looks! Thanks for stopping by!
This is perfect, we really need one of these in our homes. I had no idea that the Germans were so good at organizing things/keeping this in their place. Maybe that is where I get my organizing streak from, I am half German!
Carrie
curlycraftymom.com
You’ll be so happy if you make one…it’s so neat and tidy! My OCD little mind loves it! 🙂
I’ve noticed that many Germans love organization and having everything in its own place. Something about the way our minds work I think. 🙂
Thanks for stopping by!!
Amy
Genius! If you need your phone accessible, while it is charging, you could put another small hole in the back towards the top, snake the phone cord thru it, & place the phone on top. Ditto for an iPad you need to access while charging (reference a recipe for example).
Now I am off to read that article! Thanks.
That’s a good idea. Unfortunately, when we’re home our breadbox ends up open a lot. But, you could also just close the front rolltop with the cord underneath to have the phone on the counter or on the top. There’s so many ways to make this idea work for any use. I love it. 🙂
Amy
TRENDnet’s ten-Port USB Hub, type TU2-H10, provides ten USB 2.0 slots to a home pc. No need any CD setup necessary just connect flash sticks, memory devices enclosures, along with additional USB products. The TU2-H10 suitable for Windows® and also Mac® products and is appropriate for earlier USB 1.1 and also 1.0 units.
This is a great idea! Command strips are my favorite!
I think I’m seriously addicted. I use them for organizing, decorating, everything! 🙂